Creating a Broadcast Campaign Step-by-Step in Seen
The Broadcast Campaign Wizard in Seen is purpose-built to guide marketing operators, e-commerce leads, and communication specialists through a reliable, error-free workflow. By structuring campaign configuration into distinct sequential steps, Seen guarantees template compliance, dynamic personalization, accurate audience targeting, and controlled timing prior to launching thousands of messages across WhatsApp.
1. Step 1: Campaign Metadata & Sender Channel
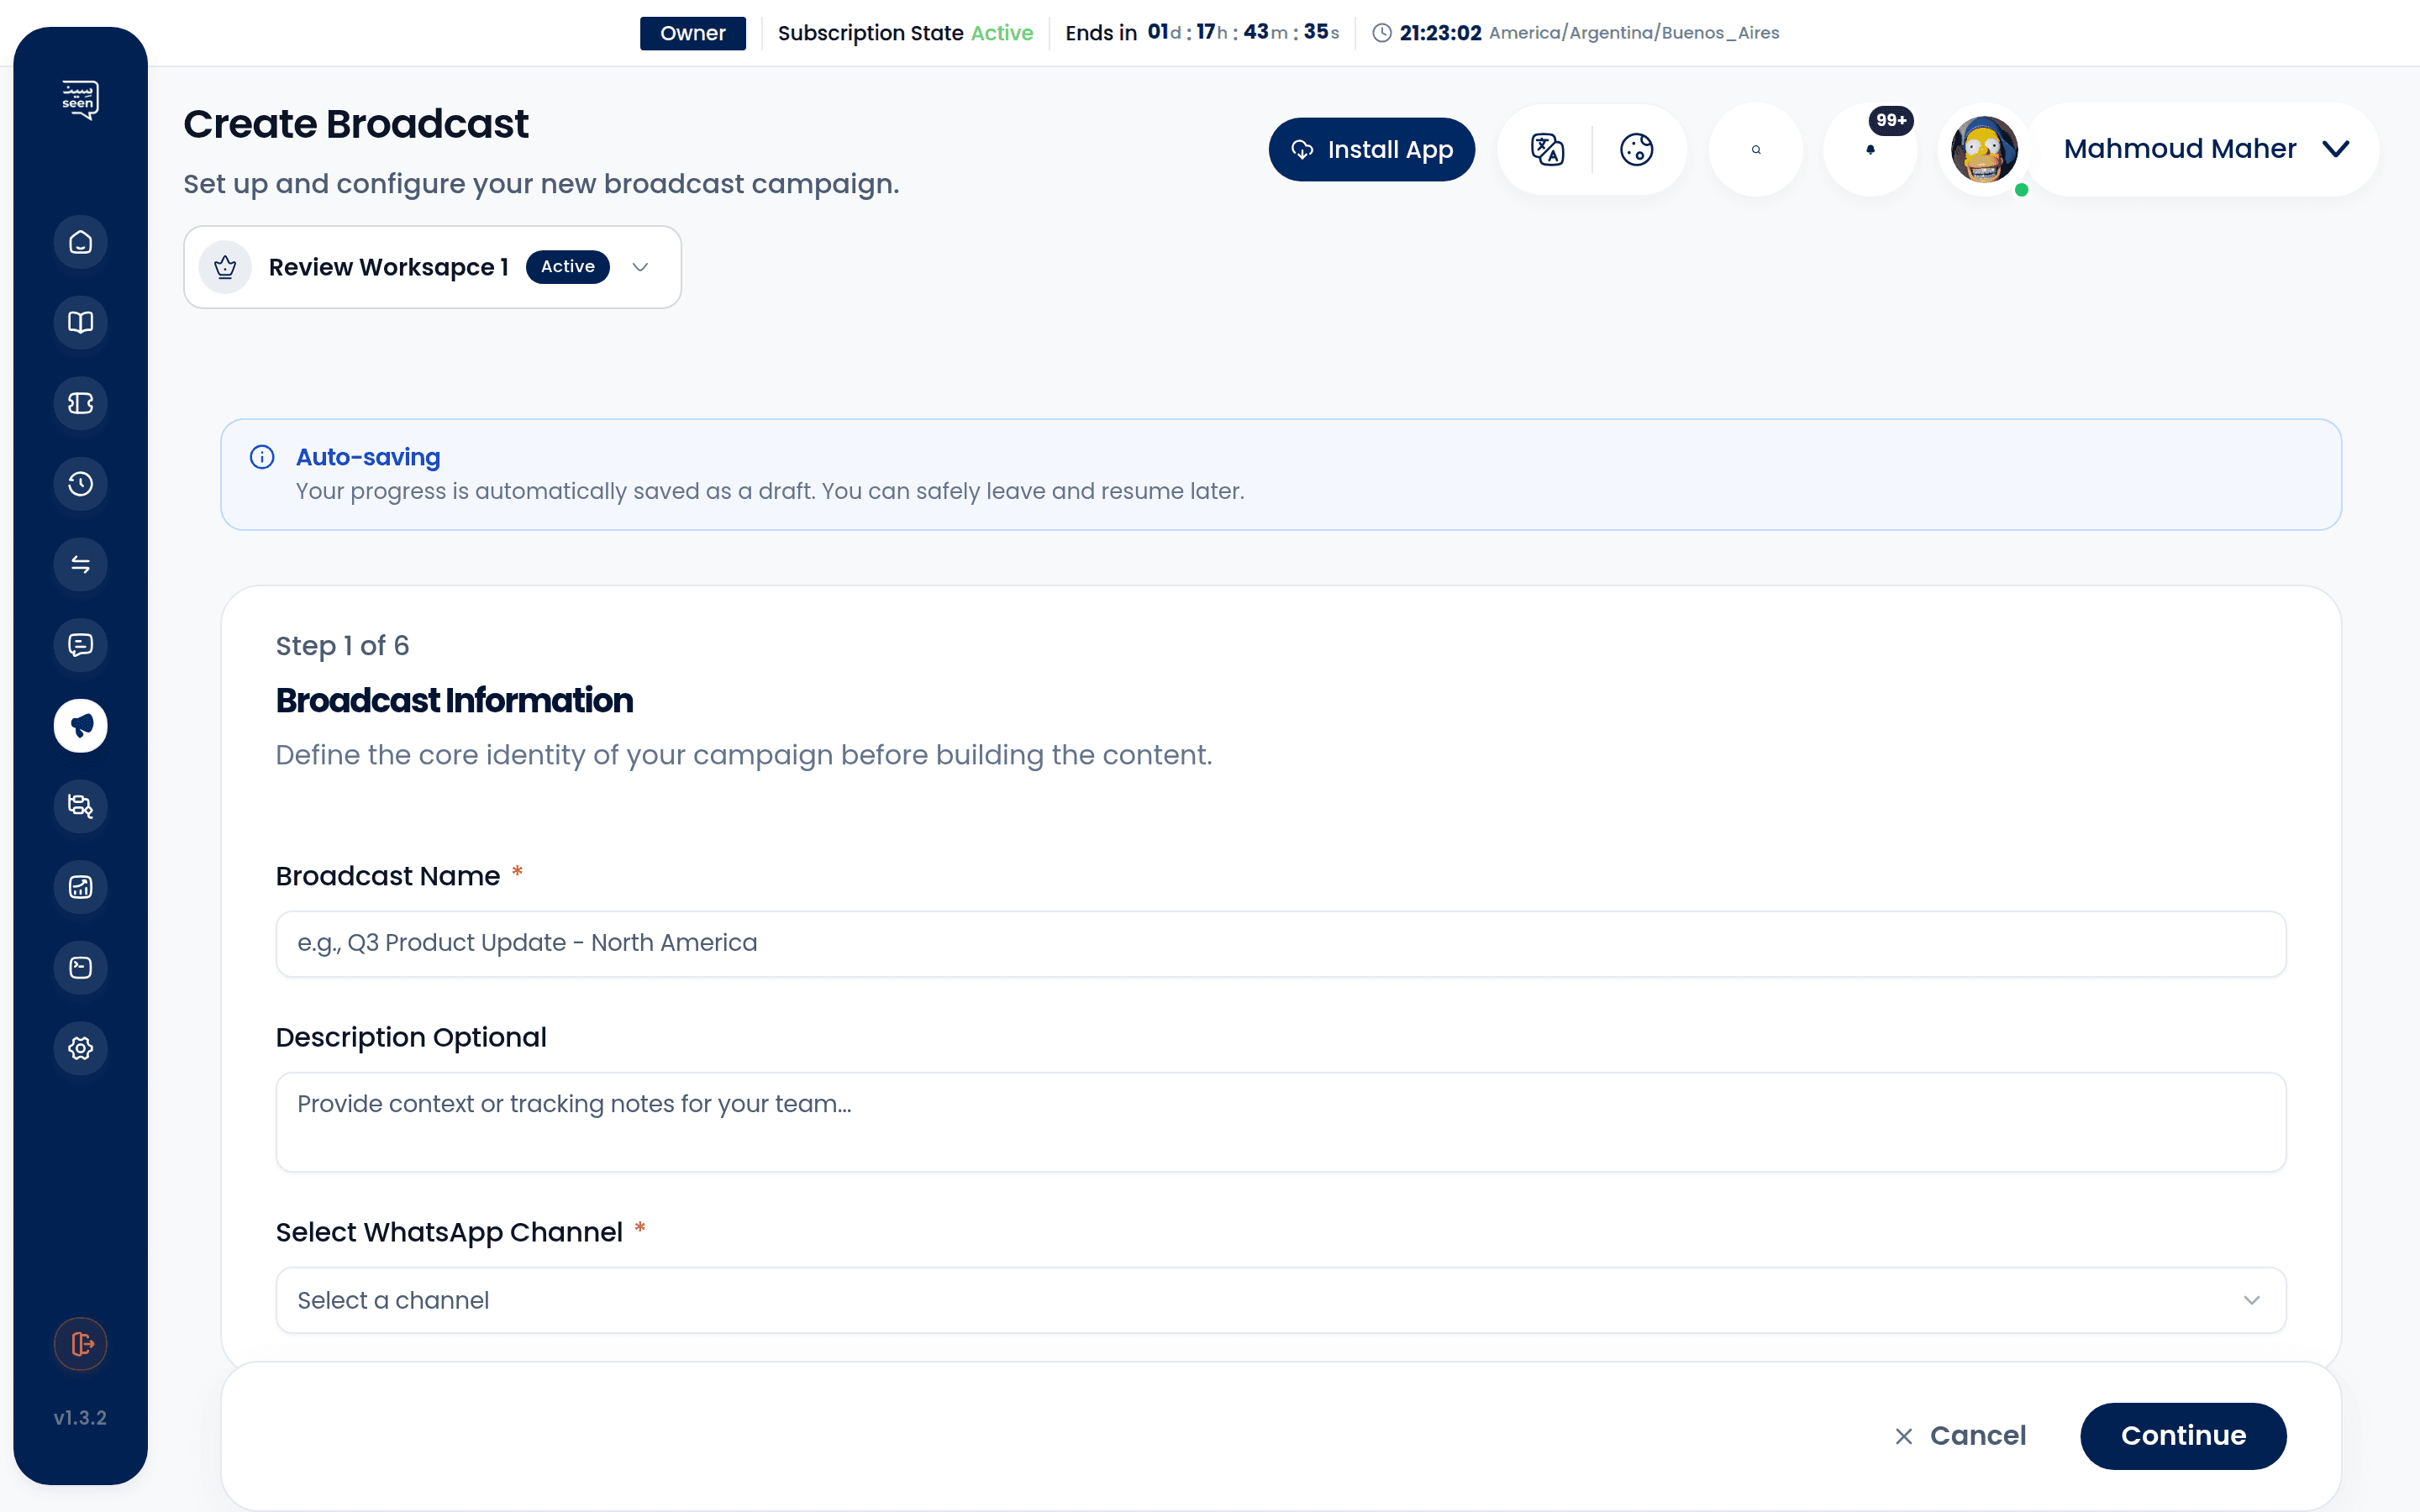
- Navigate in the sidebar to Broadcasts and click the prominent "Create Broadcast" button in the header.
- Campaign Descriptor: Input an unambiguous internal title (e.g.
2026 Ramadan Mega Sale - VIP Tier).- This name serves strictly as an internal administrative reference and is never exposed to recipients.
- Select WhatsApp Channel: Choose which verified WhatsApp Business Cloud API number will dispatch the broadcast.
- For multi-channel workspaces, ensure you designate the specific phone line allocated for promotional outreach.
Navigation Flow:
Sidebar Menu → Broadcasts → Click "Create Broadcast" Button
2. Step 2: Selecting Approved WhatsApp Templates
Per Meta regulations, proactive outbound broadcasts must utilize verified WhatsApp Message Templates:
- Browse your workspace's library of pre-approved templates (
WhatsAppVersionStatus.Approved). - Filter templates by operational classification: Marketing or Utility.
- Selecting a template renders an interactive Live Mobile Preview, accurately mirroring how the header media, body typography, dynamic variables, footer disclaimer, and interactive quick-reply buttons will render on customer smartphones.
- Click "Select Template" to advance.
3. Step 3: Audience Segmentation & Targeting
Seen provides three powerful avenues to define your target recipient list:
A) Target by Tags (Recommended)
- The fastest method to leverage internal customer intelligence.
- Select single or multiple tags (e.g.
#HighLTVand#InterestedInTech). - Choose logical evaluation operators:
- Match Any Tag (OR): Targets any customer carrying at least one selected tag.
- Match All Tags (AND): Strictly isolates customers who simultaneously carry all selected tags.
B) Target Specific Contacts
- Manually search and select individual contacts from the Contacts Directory.
- Ideal for bespoke B2B announcements or high-touch institutional accounts.
C) Upload Custom CSV Audience File
- Upload a standard CSV or Excel file containing phone numbers and campaign-specific attributes.
- Features dynamic column mapping (Phone Number, Contact Name, Custom Promo Code, Renewal Date).
- Seen's ingestion pipeline validates international E.164 phone formats and automatically de-duplicates redundant entries.
Tip: Always verify the Estimated Audience Size indicator, which calculates unique reach after stripping duplicate records and carrier format errors.
4. Step 4: Variable Mapping & Header Media Customization
For templates containing dynamic parameter placeholders (e.g. {{1}} for Name, {{2}} for Voucher Code):
Text Variable Binding
- Variable
{{1}}(First Name): Map tocontact.name. Seen automatically injects each recipient's personal name at dispatch time. - Variable
{{2}}(Dynamic Data): Map to an uploaded CSV column (such ascoupon_code) or input static text shared by all recipients (such asSPRING20).
Header Media Upload
If your selected template includes a multimedia header (Image, Video, or PDF document):
- Upload the creative asset directly from your desktop (Images up to 5MB, MP4 videos up to 16MB, or PDF catalogs).
- The asset immediately updates the live mobile preview to ensure visual alignment.
5. Step 5: Scheduling vs Instant Launch
Select your execution timing based on campaign objectives:
Instant Dispatch
- The broadcast engine engages immediately upon confirmation.
- Best suited for urgent service notifications, flash promotions, and breaking advisories.
Scheduled Dispatch
- Specify the exact calendar date, hour, and minute for automated dispatch.
- Evaluated strictly against your Workspace Timezone.
- Scheduled campaigns can be audited, modified, or canceled at any point prior to launch from the Scheduled tab.
6. Step 6: Review & Launch Confirmation
The final confirmation summary encapsulates the entire campaign footprint:
- Selected channel, campaign title, and approved template preview.
- Net verified recipient count after deduplication.
- Estimated quota deduction against your monthly subscription allowance.
- Clicking "Confirm & Launch Broadcast" initiates processing or places the campaign into the automated schedule queue.
Pre-Launch Verification Checklist
- Is the template officially approved by Meta with an active Green badge?
- Have you tested the template by sending a sample to an internal phone to verify formatting and media rendering?
- Are phone numbers properly formatted with international country codes (E.164 standard, e.g.
+966or+971)? - Does your targeted audience count align with your current Meta Messaging Tier Limit?
- Are support and sales agents staffed in the Unified Inbox to handle inbound customer replies?
Frequently Asked Questions
What happens if a recipient's name is missing from the database?
Within the Variable Mapping interface, you can designate a Fallback Value (e.g. "Valued Customer"). If a contact record lacks a name, Seen automatically injects the fallback value, avoiding awkward blank spaces.
Can I cancel a broadcast after clicking launch?
If the campaign is scheduled for a future time, you can cancel it with one click. If the campaign is actively in "Running" status, messages already dispatched to Meta cannot be recalled, but clicking "Pause" or "Cancel" halts all remaining queued messages immediately.
Where do customer responses appear after receiving a broadcast?
Every customer response generates an active conversation ticket inside the Unified Inbox, complete with channel badges and full conversational context for frontline agents.